Adding Geometry
Add Connectors: add meshes to the endpoints of cable curves;
Add or Edit Segments: add or edit meshes that follow the cable’s curvature;
Convert to Mesh Cable: create a mesh cable;
For these functions, it’s important to keep the meshes correctly oriented:
rotation should be applied to mesh (via the
Ctrl+A > Apply Rotationmenu orObject > Apply Rotationmenu);visually, the mesh should be pointing towards the Z axis (look at the sky);
for connectors and mesh cables, ideally the mesh pivot point should be located at the bottom of the mesh (but that’s not necessary);
Correct axes and results on the left, wrong on the right:
Add Connectors
Select one mesh that’s going to be a connector. The mesh should be directed towards the Z axis;
Select one or more curves and switch to Edit Mode;
Select the curve endpoints of one or more splines;
Run the function and adjust points or connectors positions, and the scale of the connectors in the modal;
Additionally:
Connector data is linked, so editing one connector will modify all of them;
Add Connectors keys:
Offset Point (S): offsets curve points to/from the connectors;Offset Connector (D): offsets the connectors to/from the points;Scale Connector (T): scales connectors;
Flip Direction (A): flips the orientation of the connectors;Hook Point to Connector (H): adds aHook Modifierto the curve and uses connectors as hooks;Remove the Original Mesh (R): removes the originally selected objects (useful if they were temporary objects, for example);
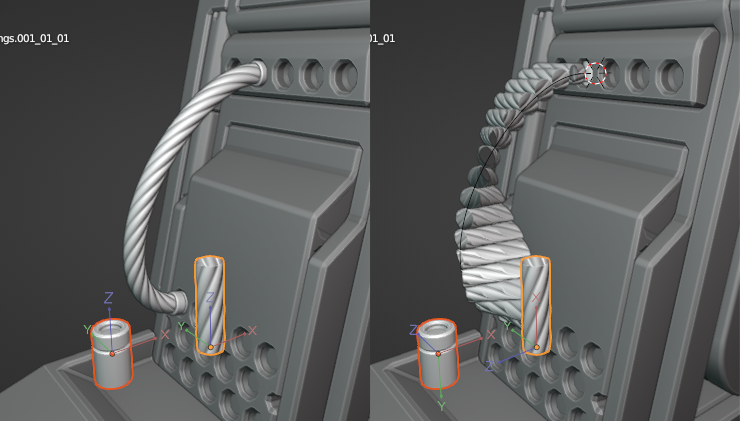
Add or Edit Segments
Select one mesh and one curve;
Run the function and adjust the offset (
D) and the rotation (F);Press
Qto quickly duplicate the segment;
Additionally:
Note that this function doesn’t work on curves with multiple splines; if your curve has multiple splines, select all points of one spline and use the
Pkey (menuCurve > Separate).Note that rotation might not work correctly if the parent curve is rotated.
Add or Edit Segments keys:
Offset Segment (D): offsets the segment along the curve;Tilt Segment (F): rotates the segment along its Z axis;Scale Segment (T): scales the segment. Note that scaling could act weird because of the Displace modifier on the segment object so ideally scaling should be done before offsetting;
Duplicate (Q): duplicates the segment and start editing it;
Convert to Mesh Cable
Select one mesh and one or more curves;
Run the function and adjust the relative (
D) or constant (E) offset if needed;Adjust the cable offset with
W;
Additionally:
Note that this function doesn’t work on curves with multiple splines, separate those first: select points of one spline and use the
Pkey (menuCurve > Separate).Note that rotation might not work correctly if the parent curve is rotated.
Cablerator 1.2.1 supports quickly converting decapped meshes from Hard Ops:
Convert to Mesh Cable keys:
Original Curve Width (S): removes or adjusts the width of the original cable (if applicable);Relative Clones Offset (D): the relative distance between meshes;Constant Clones Offset (E): the distance in units between meshes;Offset Cable (W): offsets the whole mesh cable along the curve;Tilt Cable (F): rotates the mesh cable along its Z axis;